User guide
Getting started
1.1 Signing in
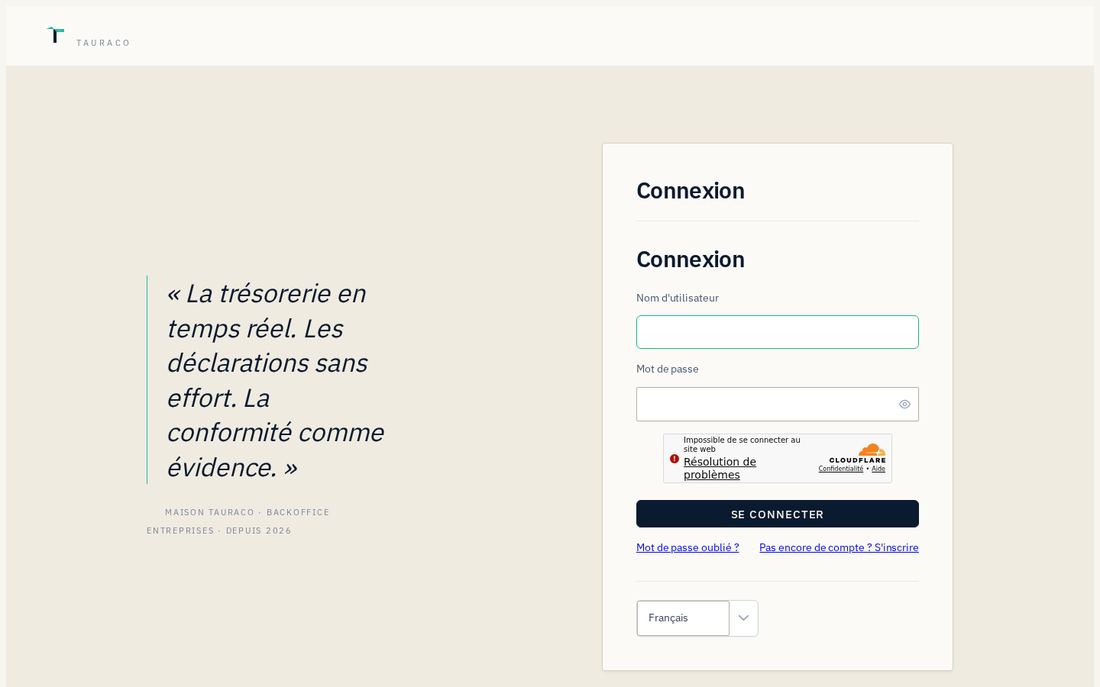
The application is at https://app.tauraco.io/login. Three other doors exist: sign-up (/signup), password reset (/forgot), and accepting an institution invitation — the link received by e-mail, which works whether you are already signed in or not.
- Open
app.tauraco.io/login. - Enter your username and password.
- Submit. You land on the page that matches your role: an operator lands on the backoffice cockpit, an ERP profile on their company's dashboard, a bank account on its received files.
To return to this starting point at any time, click the Tauraco logo at the top left.
Resetting a forgotten password
- On the sign-in screen, click « Mot de passe oublié » (Forgot password).
- Enter the e-mail address tied to the account, then submit.
- A message confirms the send — to never reveal whether an address exists or not, the confirmation always shows.
- Open the link received by e-mail and choose a new password.
1.2 Finding your way
The screen reads in three bands.
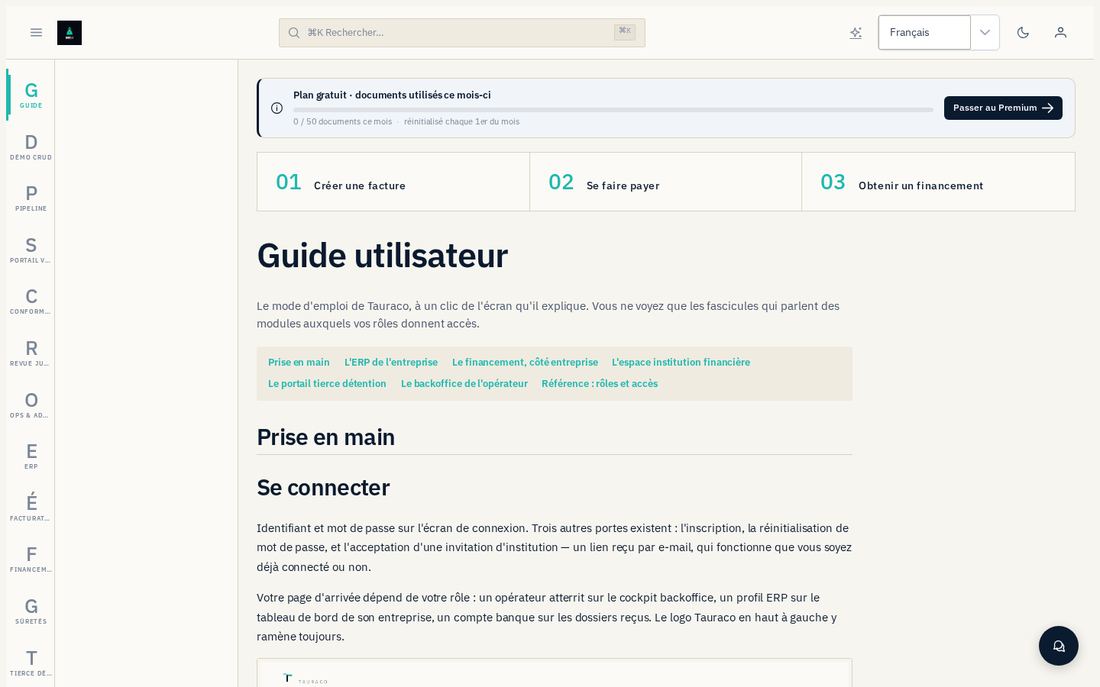
- The top bar — the side menu (☰), the logo, global search (shortcut
⌘Kor click), the ✨ AI Assistant icon (natural-language requêteur, depending on subscription), the FR/EN language switcher, the light/dark theme toggle, and your profile. - The left rail — one monogram per module (ERP, Financing, Collateral, Third-party custody…). You only see the modules your roles open.
- The side bar — the screens of the current module, grouped by domain in the ERP (Accounting, Sales, Inventory…), as a flat list elsewhere.
Depending on your situation, other elements also appear: the quota banner (Free plan: 50 documents per month, reset on the 1st), the quick-actions bar (01 Create an invoice · 02 Get paid · 03 Get financing), and the breadcrumb trail.
Switching language
- In the top bar, click the FR / EN switcher.
- Choose the language. The entire interface switches immediately, without a page reload.
1.3 Banners worth knowing how to read
- « Vue démonstration » (Demo view) — a permanent banner that signals an operator is visiting a demo tenant with a token capped at 15 minutes. Full detail in §6.
- Free plan — the month's document counter and the « Passer au Premium » (Upgrade to Premium) link. Screens reserved for Premium (fixed assets, cash-flow forecast, French compliance, accountant space, imports) show behind a gate that explains it, rather than simply disappearing.
1.4 If a screen shows "Access denied"
Two possible causes, and the message clearly tells them apart:
- your platform role does not cover this surface — it is your organization's administrator who assigns roles;
- you have no space authorization in the Collateral, Bank financing, or Third-party custody modules — it is the institution (or the custodian) itself that assigns it.
The detail of roles and contexts to select is in the annex.