The company's ERP
ERP module in the left rail. This is the day-to-day management tool — usable on its own, without ever requesting financing — and it is also what builds, as you work, the file you will present if you request financing (§3).
2.1 Dashboard
The dashboard (ERP → Tableau de bord) shows cash position, the month's revenue, accounts receivable, and accounts payable, with an "Analysis of your situation" that flags what deserves attention. The analytics dashboard (Rapports → Tableau de bord analytique) goes further: overdue invoices, invoices to chase, trends.
2.2 Sales
Creating a customer
ERP → Ventes → Clients, then « Nouveau client » (New customer).- Enter the company name, the SIREN (or equivalent identifier), and the address.
- Save. The customer record opens; it then shows the outstanding balance as invoices accrue.
Creating and issuing a sales invoice
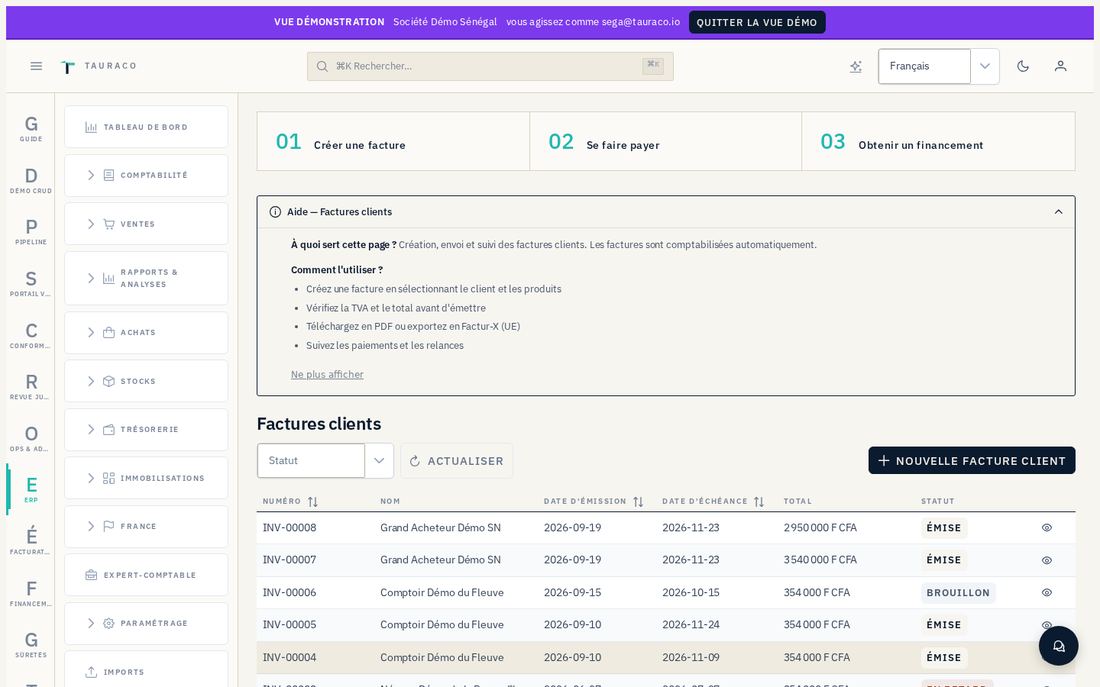
Ventes → Factures clients, then « Nouvelle facture » (New invoice).- Choose the customer, add lines from the Products catalog (each line applies the tax rate defined in
Ventes → Taxes). - Check the total, the due date, and the currency.
- Save as a draft, then « Émettre » (Issue) — the invoice changes status and is posted automatically according to the posting rules defined in settings.
- From the invoice record, send it to the customer if needed.
An invoice's record carries the « Demander un financement » (Request financing) button — this is the bridge to the Financing module (§3).
Recording a payment received
Ventes → Paiements reçus, then « Nouveau paiement » (New payment).- Select the invoice(s) being settled, the amount, the date, and the receiving bank account.
- Save — the invoice's status moves to "paid" or "partially paid" depending on the amount.
Issuing a credit note
- From the invoice in question, or
Ventes → Avoirs → Nouvel avoir. - Enter the reason and the amount (full or partial).
- Save — the credit note applies to the original invoice and reduces its remaining balance.
Chasing an unpaid invoice
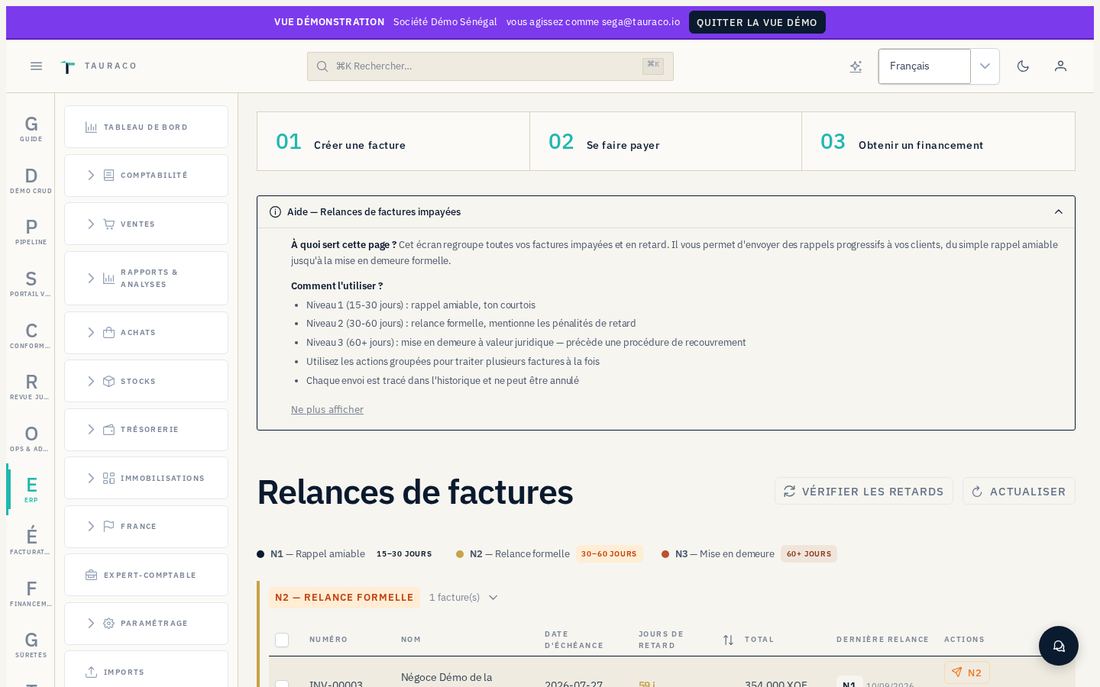
Ventes → Relances— the list of overdue invoices, with their dunning level.- Open the invoice in question.
- Trigger the next level: a friendly reminder, then successive follow-ups up to formal notice.
Creating a recurring invoice
Ventes → Factures récurrentes, then « Nouvelle facture récurrente » (New recurring invoice).- Define the customer, the lines, and the issuing frequency.
- Save — the platform automatically issues a new invoice at each occurrence of the chosen frequency.
2.3 Purchases
Creating a supplier
ERP → Achats → Fournisseurs, then « Nouveau fournisseur » (New supplier).- Enter the company name, contact details, and IBAN.
- Save — the record then shows the supplier's outstanding balance.
Recording a supplier invoice
Achats → Factures fournisseurs, then « Nouvelle facture » (New invoice).- Choose the supplier, enter the amount, the due date, and the line detail.
- Save. The invoice appears in the due-date tracker until it is settled.
2.4 Scanning and ingesting an invoice (OCR)
Rather than keying in an invoice received on paper or as a PDF, you can drop it and let the platform extract it.
ERP → Ingestion, then drop the file (PDF or image).- The document enters the document pipeline: antivirus, then OCR, then field extraction, then validation, then analysis (status "Analysée" — Analyzed).
- Track its progress in real time — each document shows its current status.
- If an anomaly is detected, the document moves into a review queue for a check before validation.
- Once analyzed, the document feeds the matching invoice in the ERP.
2.5 Accounting
Viewing and configuring the chart of accounts
Comptabilité → Plan de comptes shows the PCG or SYSCOHADA chart of accounts, depending on the accounting regime set in Paramétrage → Société.
Entering a journal entry
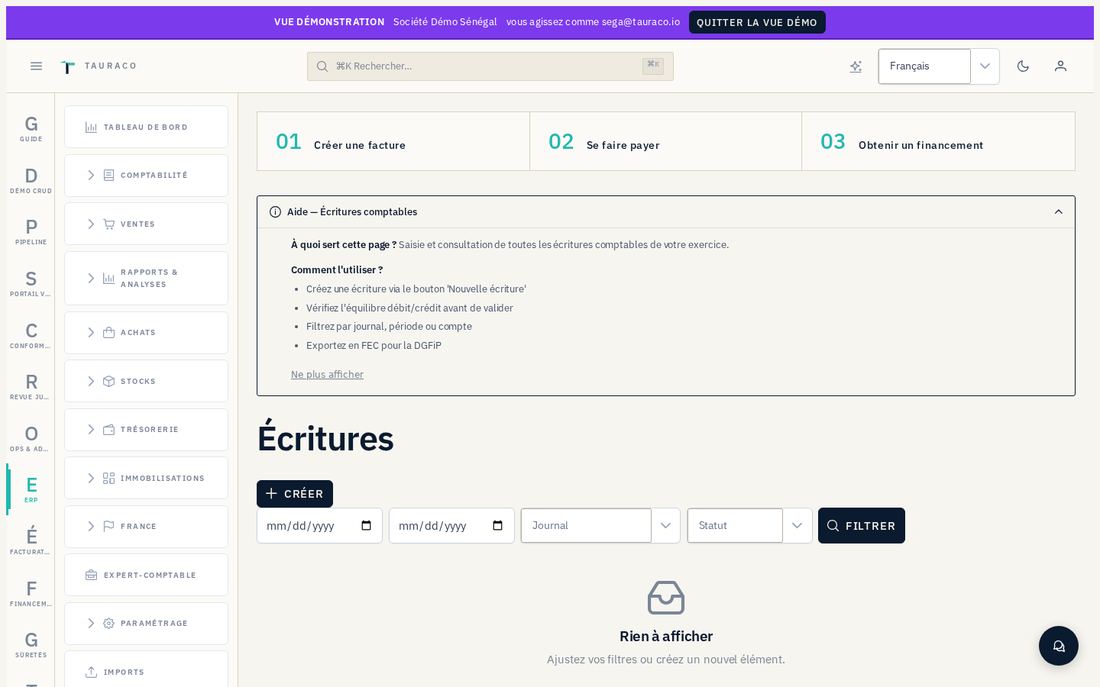
Comptabilité → Écritures, then « Nouvelle écriture » (New entry).- Choose the journal (purchases, sales, treasury, or miscellaneous transactions).
- Add the debit and credit lines — the entry must balance before it can be saved.
- Confirm.
Reconciling entries
Comptabilité → Lettrage.- Select the account to reconcile (customer or supplier, generally).
- Check the entries that offset each other (an invoice and its payment, for example).
- Confirm the reconciliation — the matched lines now carry the same code.
Closing and locking a fiscal period
Comptabilité → Périodes fiscales.- Select the period to close.
- Confirm the closing.
2.6 Inventory
The inventory sub-ledger obeys one central rule: a lot's balance is never entered — it is derived from the movement journal, which is append-only.
Viewing balances
Stocks → Vue d'ensemble presents balances and reservations by item and by warehouse. Stocks → Articles, Entrepôts and Lots hold the reference data — a warehouse can be placed under a custodian's control (§5).
Recording a stock movement
Stocks → Mouvements, then « Nouveau mouvement » (New movement).- Choose the type: inbound, outbound, or transfer between warehouses.
- Enter the item, the lot, the quantity, and the warehouse (or both warehouses, for a transfer).
- Save. An error is never erased: it is reversed by an offsetting movement.
Running a stock count
Stocks → Comptages, then « Nouveau comptage » (New count) — it starts as a draft.- Enter the quantities physically observed, item by item.
- « Poster » (Post) the count — this action locks the observed variance at that date; a posted count can no longer be edited.
A lot can then be pledged as collateral for a financing backed by inventory — prudent valuation, eligibility, and third-party custody are described from the institution's side (§4) and the custodian's side (§5).
2.7 Treasury
Tracking a bank account and its movements
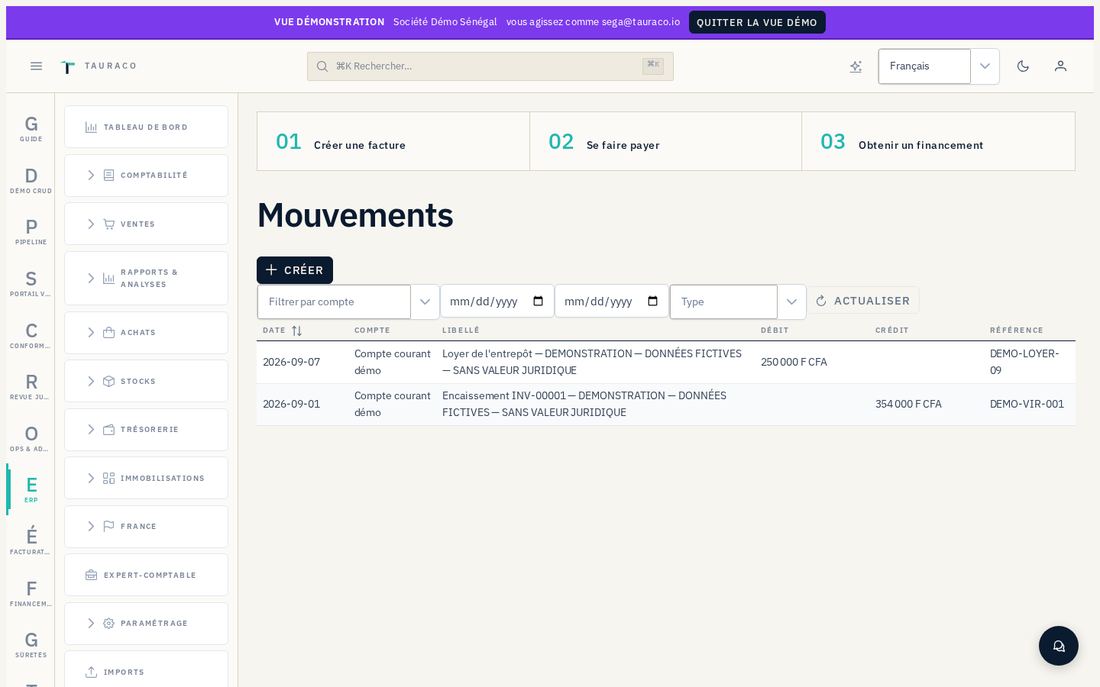
Trésorerie → Comptes bancaires, then « Nouveau compte » (New account) to declare one.Trésorerie → Mouvementsto view or record a receipt or a disbursement.
Viewing the cash-flow forecast (Premium)
Trésorerie → Prévisionnel projects expected receipts, upcoming due dates, and lets you compare scenarios.
2.8 Fixed assets (Premium)
ERP → Immobilisations → Catégoriesto define asset categories (equipment, vehicles, software…).Immobilisations → Actifs, then « Nouvel actif » (New asset) — enter the category, the in-service date, and the acquisition value.Immobilisations → Amortissementsto view the automatically generated depreciation schedule.
2.9 Exchange rates (multi-currency FX)
Paramétrage → Taux de change.- Add or update a rate between two currencies (XOF, XAF, EUR, USD…).
- Save — documents issued in a foreign currency rely on this rate.
2.10 E-invoicing and French compliance (Premium)
For companies under the PCG regime: ERP → France opens VAT (CA3/CA12), the FEC export for tax audits, and Factur-X. E-invoicing on the platform side (directory, accredited platforms, submissions) is an administration module described in §6.
A submitted document follows the same pipeline as ingestion (§2.4) up to its "Analysée" (Analyzed) status — it is at this stage that its fields become available for posting and, where applicable, submission to the accredited platform.
2.11 Settings
Configuring the company
Paramétrage → Société.- Enter identity, country, accounting regime (PCG or SYSCOHADA), and logo.
- Save.
Managing users and their roles
Paramétrage → Utilisateurs & rôles, then « Inviter un utilisateur » (Invite a user).- Enter the e-mail address and choose an ERP role from among the eight available, from owner to viewer.
- Send the invitation — the invitee accepts it by e-mail and joins your space with the scope of the chosen role.
Managing the subscription and quotas
Paramétrage → Abonnement.- View the month's document counter (Free plan: 50, reset on the 1st).
- Click « Passer au Premium » (Upgrade to Premium) to unlock fixed assets, cash-flow forecast, French compliance, accountant space, imports, and the AI Assistant.
Defining posting rules
Paramétrage → Règles de comptabilisation, then « Nouvelle règle » (New rule).- Define a keyword or a criterion, and the account it should be automatically assigned to.
- Save — matching future documents will be posted according to this rule.
2.12 Accountant space (Premium)
ERP → Expert-comptable, then « Inviter mon cabinet » (Invite my firm).- Enter the firm's e-mail address and choose the access level: read-only accounting, or full read access.
- Send — the accountant receives the invitation by e-mail and then chooses your file from their own space.
ERP → Imports (FEC, CSV, Sage, QuickBooks, Pennylane) and ERP → Migration guide the takeover of an existing accounting history.
2.13 Reports, requêteur, and search
- Generated reports — income statement, balance sheet, VAT…
- Requêteur — ad hoc queries with no SQL: pick an entity, filters, columns, then export.
- Global search — shortcut
⌘K, available from any screen. - AI Assistant (✨ icon) — answers in natural language about your own data, within the limits of your subscription and your role. Data isolation is enforced server-side: it is never negotiable from the question asked.